


DIY Project: How to Install Shelves on Different Types of Walls
Installing shelves at home helps to optimise space, organise rooms and give a decorative touch. However, although it seems like a simple task, questions often arise about the type of wall, the steps to follow and, of course, the most suitable tools.
Therefore, VITO shows you how to plan and install shelves safely and efficiently, highlighting some tools that will make the entire process easier.
What You Should Know Before You Start
Identify the type of wall
Success in installing a shelf depends largely on the consistency of the wall material. The differences are important as they influence the way you drill.
- Brick or concrete wall – It is resistant and supports more weight. Allows shelves for books, crockery, or heavy decorative objects.
- Drywall (plasterboard) – Hollow and more sensitive wall. It requires specific anchors and lower load limits.
- Wood or chipboard – Easy to drill, but the load capacity depends on the thickness and structure of the wall.
Choosing the right drill bit
The choice of drill bits plays a key role in this process, as each material requires a specific drill bit, not only to ensure a clean hole but also to avoid damaging the wall or the tool.
To understand which drill bit is right for each situation, check out VITO's article "Simplifying the Selection of Drill Bits".
Selecting the Right Tools
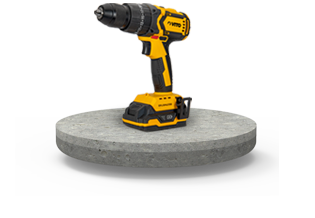
Cordless Brushless Combi Drill 20V
This combi drill is a versatile tool for shelving installation because it combines three fundamental functions:
- Screwdriving
- Drilling
- Impact drilling
Thanks to this combination, you can work with brick and concrete, but also with more sensitive materials such as plasterboard, wood, or chipboard, just by adjusting the mode of use.
Lighter and easier to handle, it prevents cracks in the walls and keeps the hole with the right diameter for the anchor, ensuring you get the results you are looking for.
Measuring Tape with Viewing Window
The measuring tape is an indispensable tool for performing accurate measurements, ensuring shelf alignment and correct spacing between brackets.
The built-in viewing window lets you read the measurement through the top window, making it easy to work at awkward angles or in tight spaces.

Brushless Wet and Dry Vacuum Cleaner 20V
A great ally during and after installation, as it allows:
- To suck up fine dust generated by drilling;
- Remove residues of wood, plaster, or small fragments;
- Clean liquids if you are working in an area that requires quick sanitation.
In this way, it is especially useful for those who like to keep their space clean while working, preventing dust from spreading around the house.

Step-by-Step Installation
1) Choose the location and set the height
Before drilling, think about the function of the shelf:
- Decoration (light books, plants, frames);
- Storage (boxes, tools, jars);
- Heavy load (books, crockery, equipment).
2) Mark the dots with the measuring tape
This is the step that prevents the shelves from being misaligned:
- Lean the shelf brackets against the wall;
- Mark the dots with a pencil;
- Measure the distance between the holes and the desired height;
- Check the measurements before drilling.
3) Install the anchors and fix the brackets
- Insert the anchor (it should be tight) and adjust the screw to it;
- Lean the bracket and screw it on.
4) Assemble shelf and test resistance
After fixing:
- Fit the shelf to the brackets;
- Test stability by applying pressure gradually.
Installing shelves is a project with simple steps, however it is necessary to consider the type of wall, the weight to support and the materials chosen.
With VITO tools, you can ensure a clean, stable, and long-lasting work, perfect for adding functionality and style to your home.
- Contacts
- Contact form support@vito-tools.com
 +351 967 817 569
 * text messages only
Subscribe our newsletter
Become BRAVER every day. Be updated with all the latest news, promotions and campaigns from VITO.


Elected brand
by Portuguese!
© 2026 VITO . All rights reserved.
TOOLS FOR
THE BRAVE
Present in the market for over 30 years, VITO is a national and international reference in machines, tools, equipment and accessories for construction, agriculture, gardening, security and auto. With a presence in more than 2,000 points of sale, VITO is within walking distance of what you need.